
Making a Mario Castle from scratch: Babylon.js (4.2)
Holy moly. Let's talk about how amazing GL rendering for the web can be. If you are anything like me, both you and your clients like flashing lights, pretty pictures, etc. So if this video doesn't arch an eyebrow, feel free to skip to the next post.🤨
where to begin?
Ok so now, if you're like me, you wonder... um... so... where on earth do I get started?
Especially since Babylon 4.2 was just released at the time of this post, the answer here is the same as it is with pretty much any NPM package, framework or what-have you. With the docs, laddie, with the docs.

First off, I'm going to point out that their tutorials and documents section is phenomenal (now). Although there have been complaints in the past about inconsistencies within the documentation, I can safely say you can make it all the way through the entry tutorials and get yourself some babyl-action on the screen with pretty much zero guff. If it's your first time using Js to render GL scenes (like me), you'll feel like an animation/game dev's Pinocchio. 🦗🎩🌠

You can take your 'hello world' tutorial and shove it, the entry-level docs on Babylon's site have you create your 'hello world', as a scene and show you how to put it into a website right away. They even recently added support for React native, for all you mobile devs who're wondering.
baby steps
The docs first suggest using the playground to familiarize yourself with the turf. There is a huge amount of customization, import, export, etc. involved in the playground, and it can be daunting, but I promise it's simpler than it looks to get started.
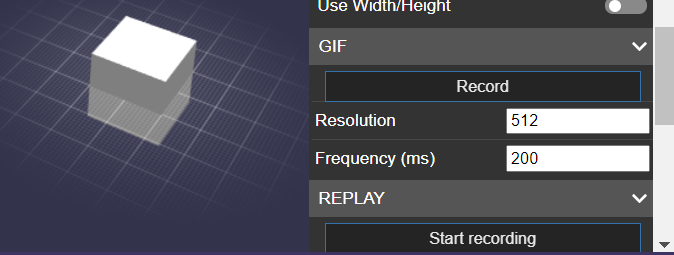
You can even record small gifs or videos and download them right away, if you don't want to go through the fun of actually rendering your Babylon scene on a live site.
seeing is believing
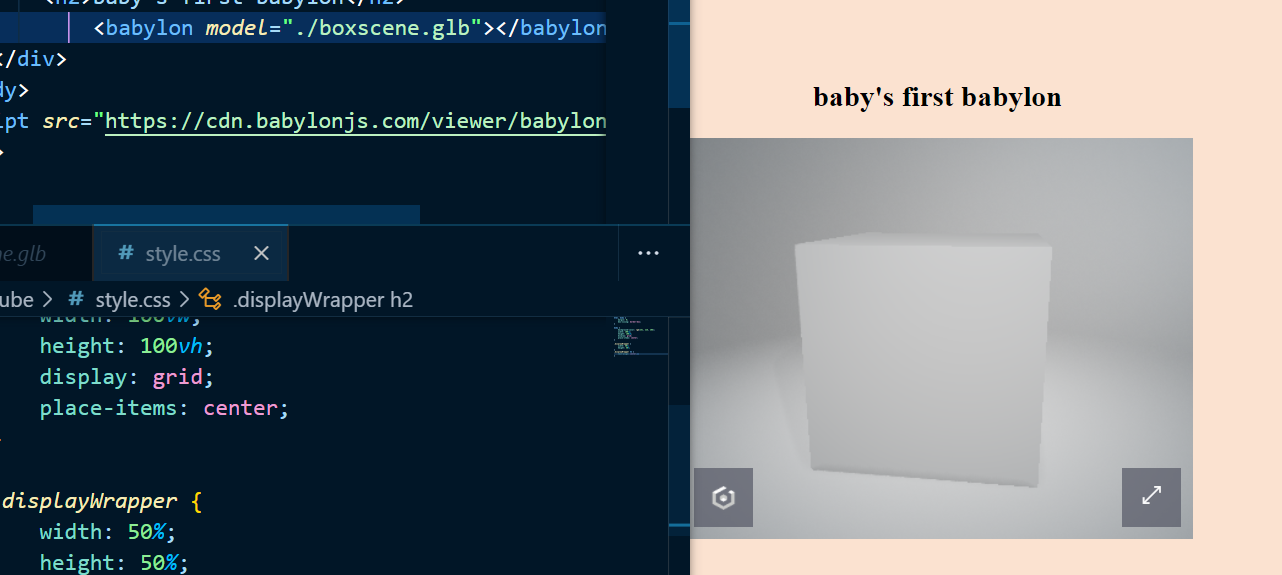
So you built yourself a 3d model of an object? Or someone did it for you already? You just want to put it on a page? They took care of that too. The Babylon Viewer (a customizable prefabbed viewing module) is as easy to drop in as a CDN link. After that you can add a Babylon element with a model attribute as seen below.
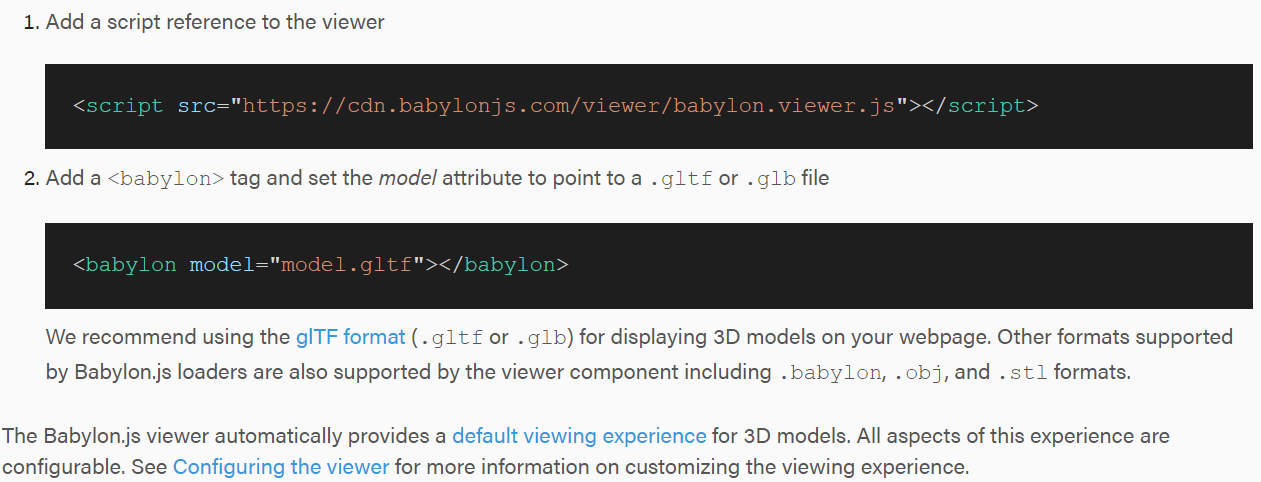
yup. It's that easy.
You can also install it as an NPM package, if you so choose.
npm install --save babylonjs-viewersome basics
Each object to be rendered in the scene has to be first imported or created as a mesh, which is done asynchronously. That means to do any basic editing of the scene in the playground, we'll have to await the import. Say I want to move a house model 'up' the y axis, to put it on an eventual hill..
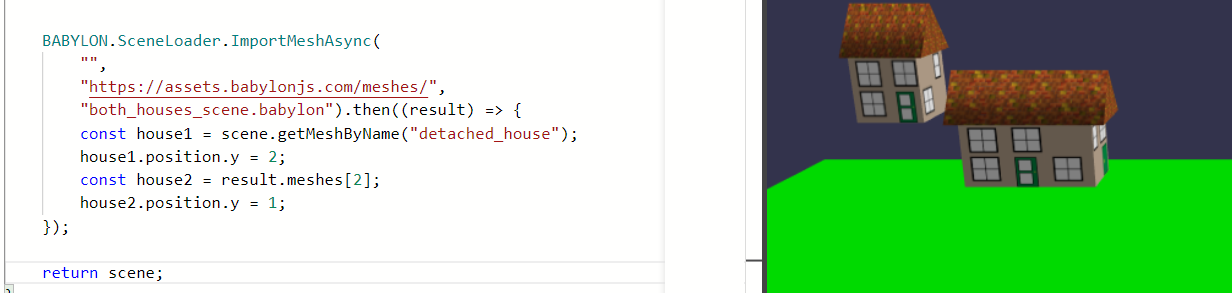
See that .then chain? you guessed it.
This code first imports all the individual object meshes from the scene folder in question, then we begin the mathing! That will come later (as there are legions of helpful documents on the actual code one can use to take full advantage of Babylon).
What if, however, we don't want to use that easy-up Babylon viewer? What if we want to put it in our page the old fashioned way? Skip right to here.
And if you are wondering whether touch screens are supported in the viewer... well...

Where to go next
After learning the absolute basics, I would still highly recommend the following tutorial about building a village, which is of course the next chapter in the docs. I normally dive into a heinously over-scoped project for immersion value and skim the docs as I go for what I need, but for a whole new library, I would definitely say dig into those docs first. They are only slightly intimidating, but after some careful poking and prodding...
Ok enough of amateur hour. Let's build some throwback sweetness.
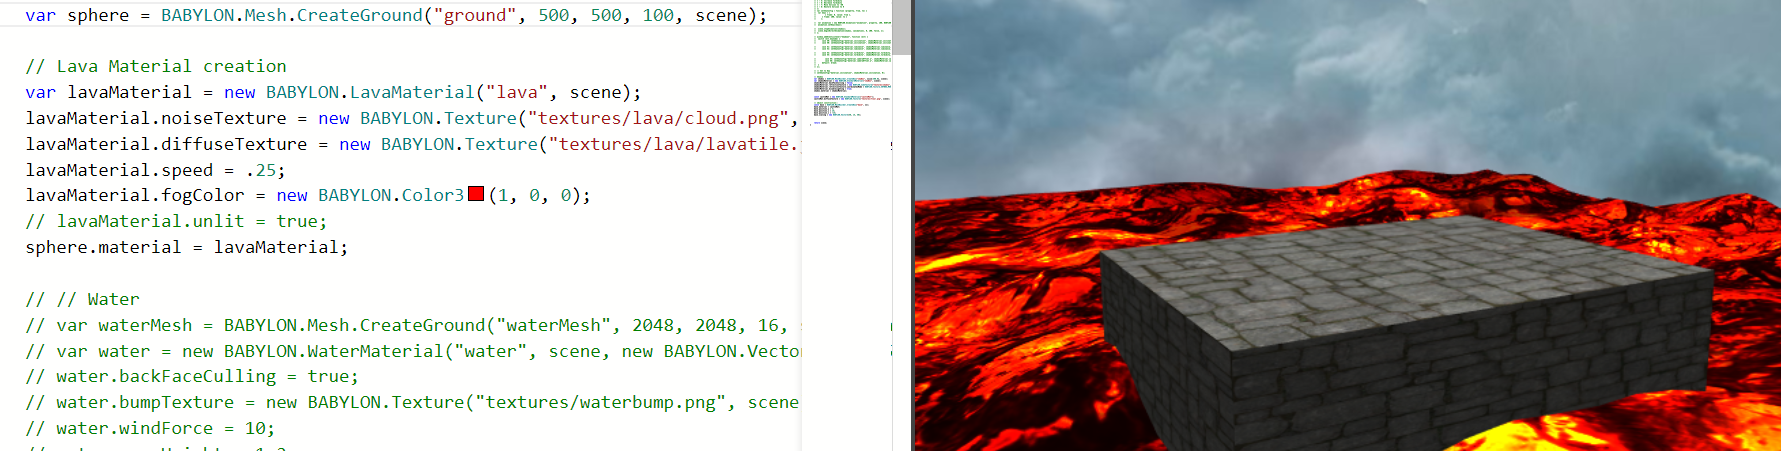
I started playing with laying foundations with the CreateGround() and CreateGroundFromHeightMap(), meshing some water, and ended up with a platform and a nice little lake. They also have prebuilt skyboxes for a true scene feel, or you can construct and wrap your own if you're feeling frisky! I'll make a few I thought of later, but for now let's use a preset.
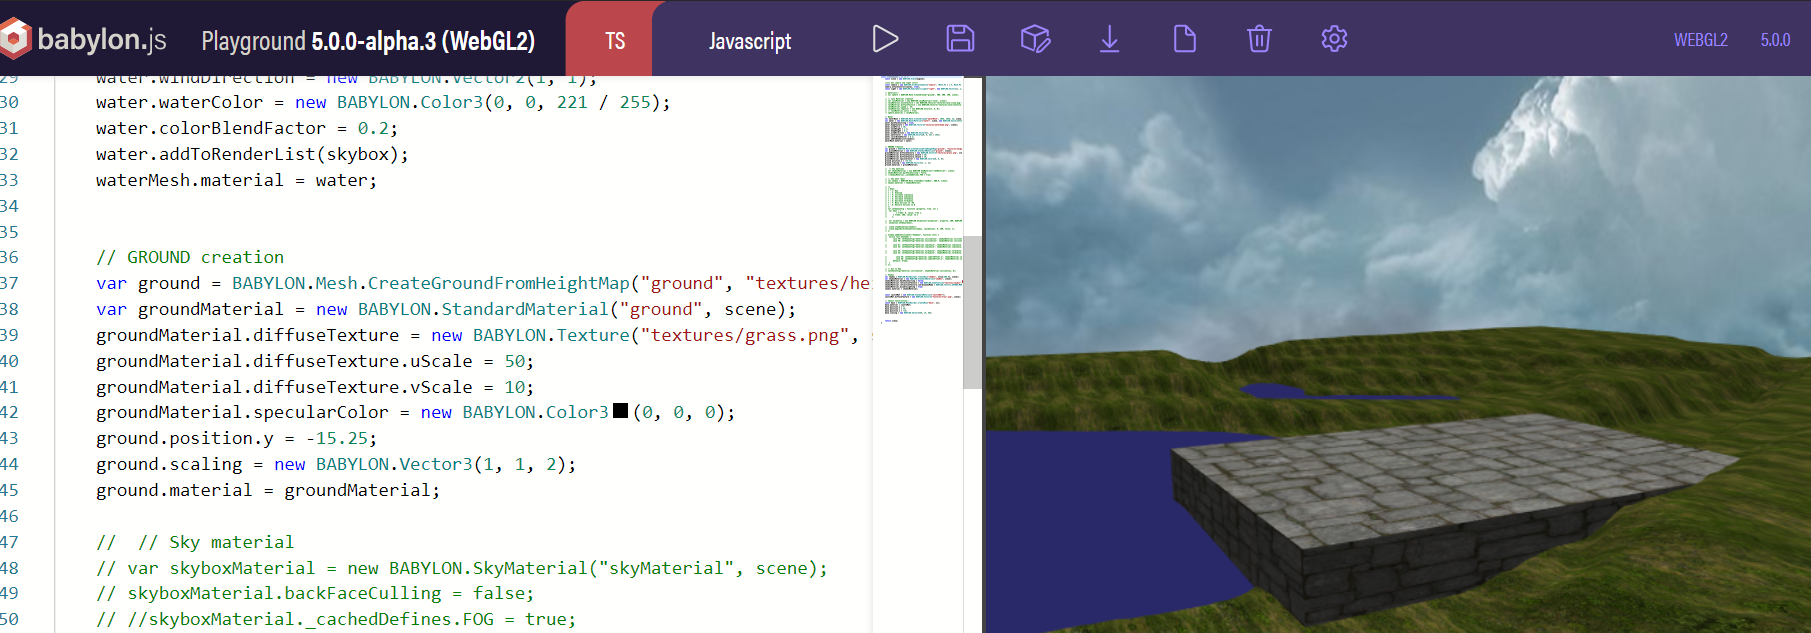
Wait, did I see lava?
Holy smokes, it animates right out of the gate. So fun to play with. I'm super cereal. This and quite a few other bits of free candy are available in the Babylon Libraries (you can read more here).
Let's get a little fancier...
I liked the idea of creating my own textures, which I began with GIMP (my favorite open source image editor). Let's face it, without being paid to do graphic design, I don't have time for Adobe's ceaseless background processes, forceful system occupation, or monthly fee.
It began with clipart. clipart.
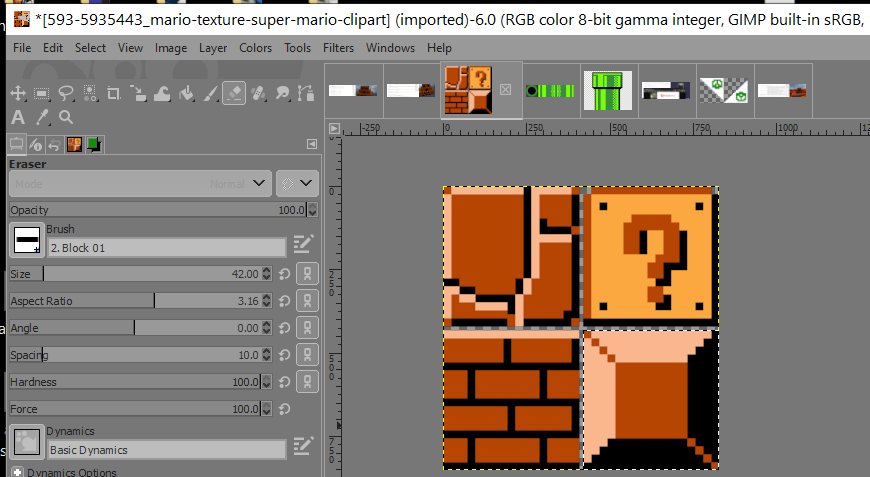
You see, each object you render into field with Babylon can be given a material and texture, and since their playground examples used separately hosted photos (available as part of their free library of stuff-to-use), I Immediately thought of Flickr and Imgur for my personal textures. Spoiler alert - Flickr's tendency to force the jpeg file format leads to problems if you want to skin with any transparency.
The general flow of making a basic object is this:
- Define a material, so it exists before you use it when creating the object.
- Create said object, setting it's material property to the one you just made (or any one you have previously defined within global or accessible scope).

A little bit more of a challenge...
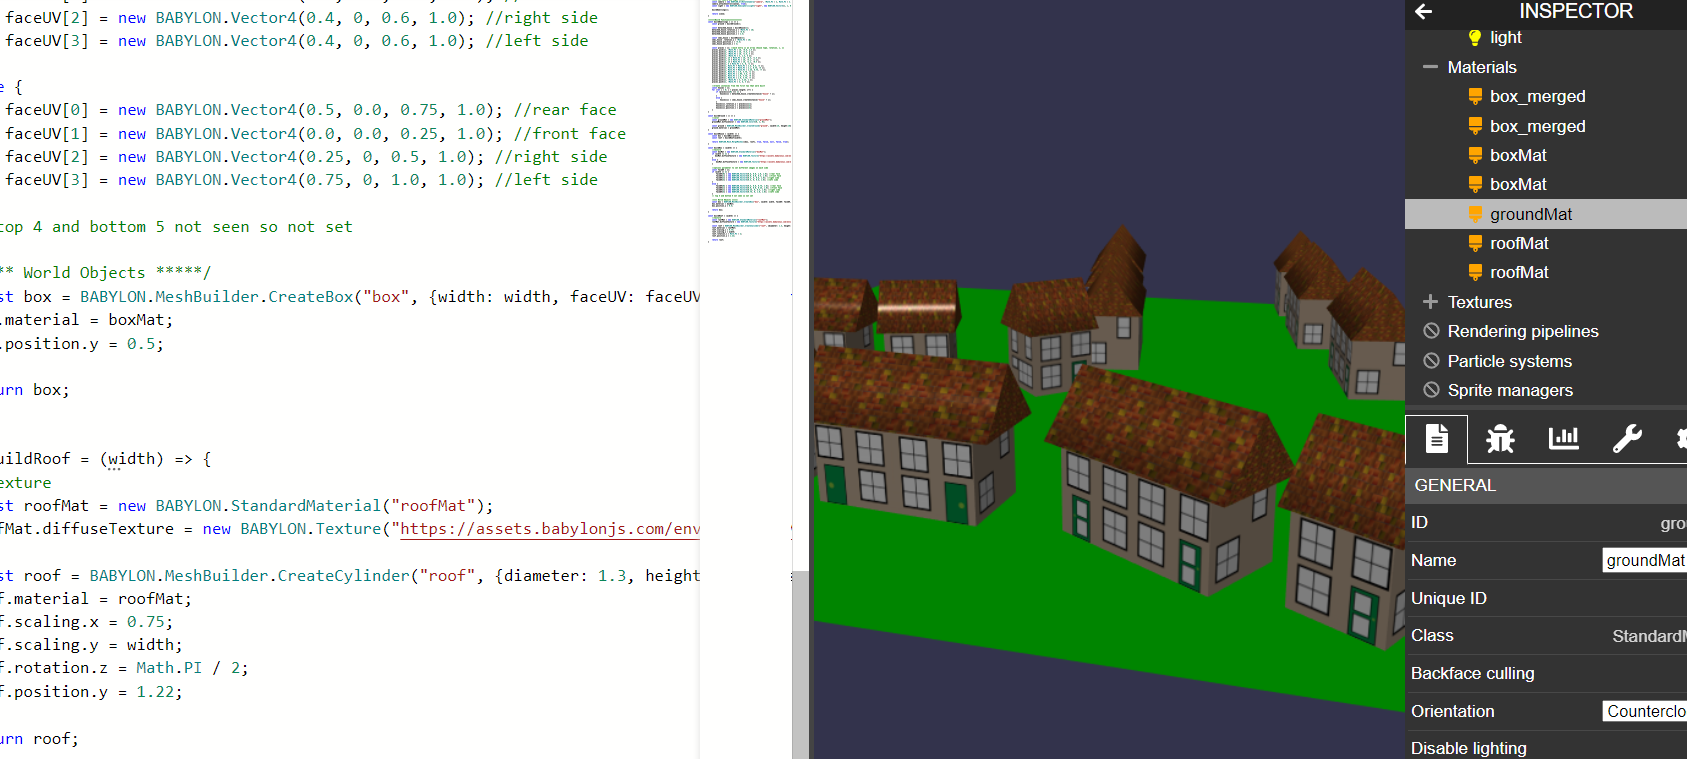
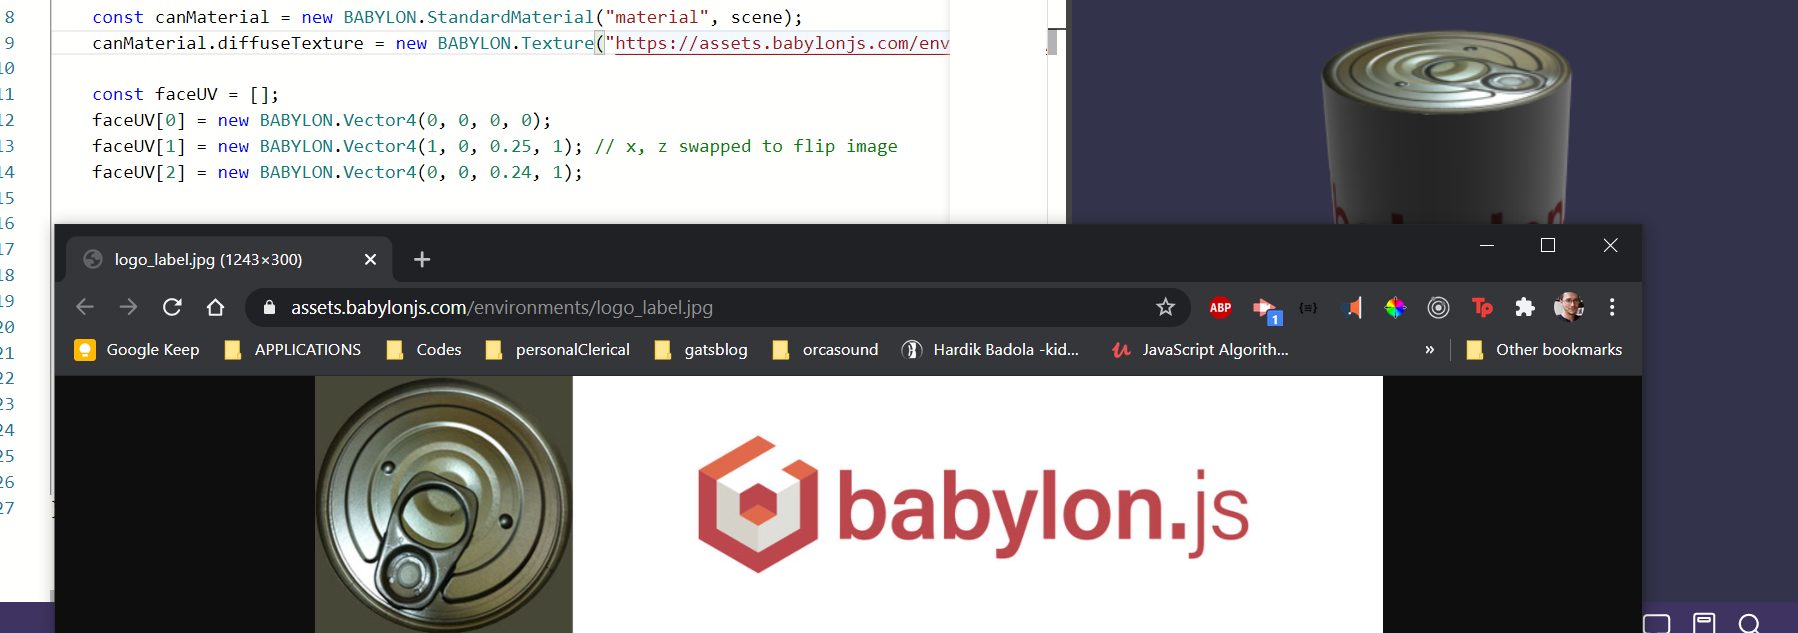
Say you want to 'skin' an object with different faces? You can do that with a single image by designating the used portion of your 'master texture' photo with a bit of multi-dimensional array love and passing a faceUV array to your created object on construction. Think of U and V as X and Y on your texture image so Babylon knows which part goes where. (Dive deeper here) (Ev's example texture available here)
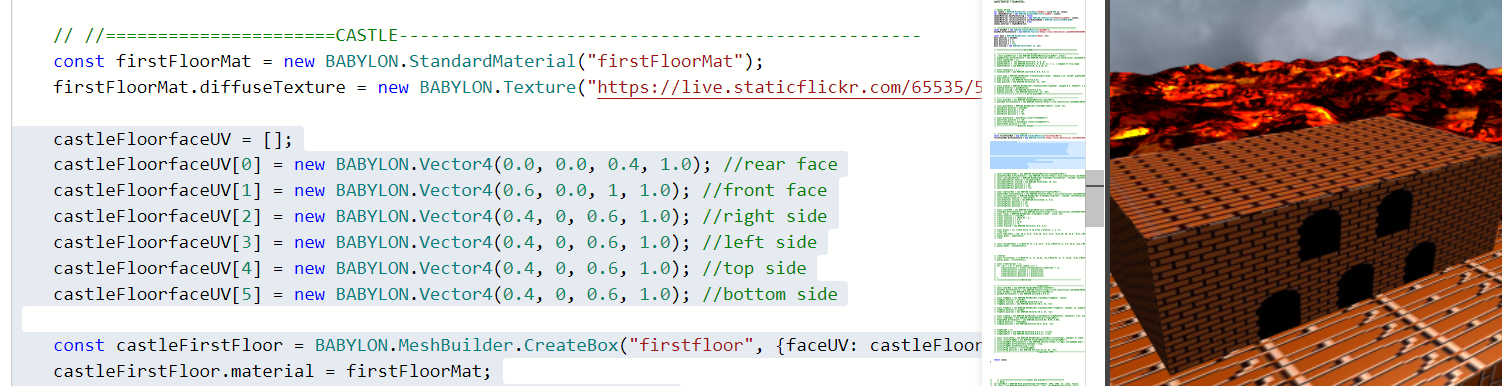
Great! Twice more and a few more custom textures, and we have the makin's of a castle, maw.
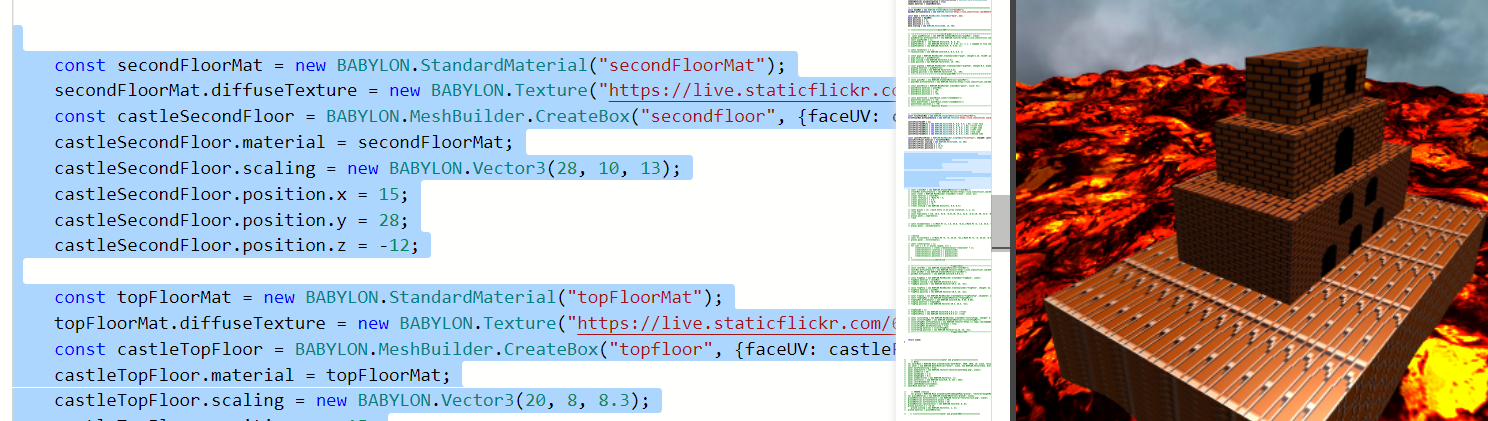
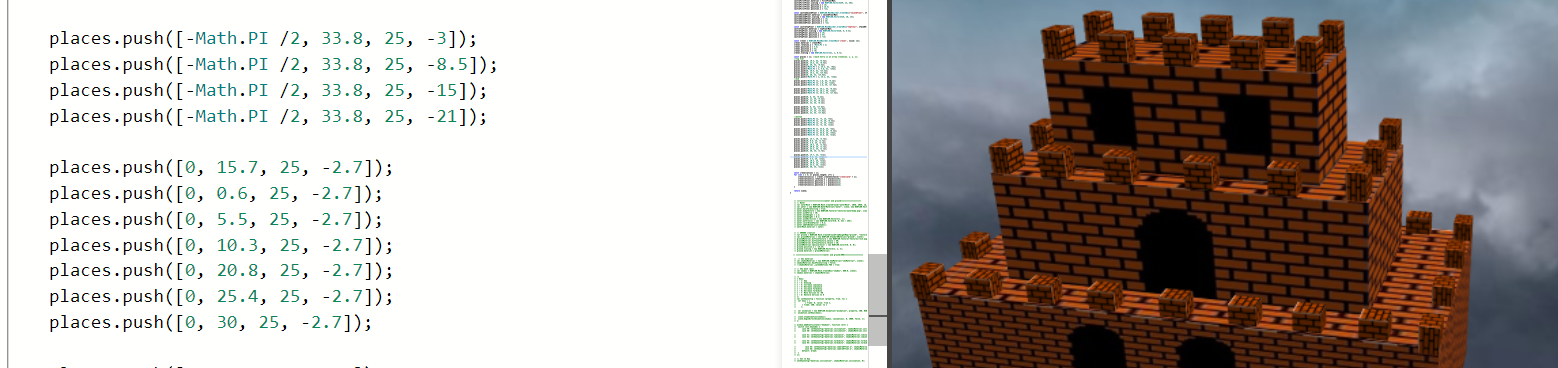
The next part was fun, making crenellations for the tops of the castle walls.
Wait. do I really have to make each box individually? Only slightly!
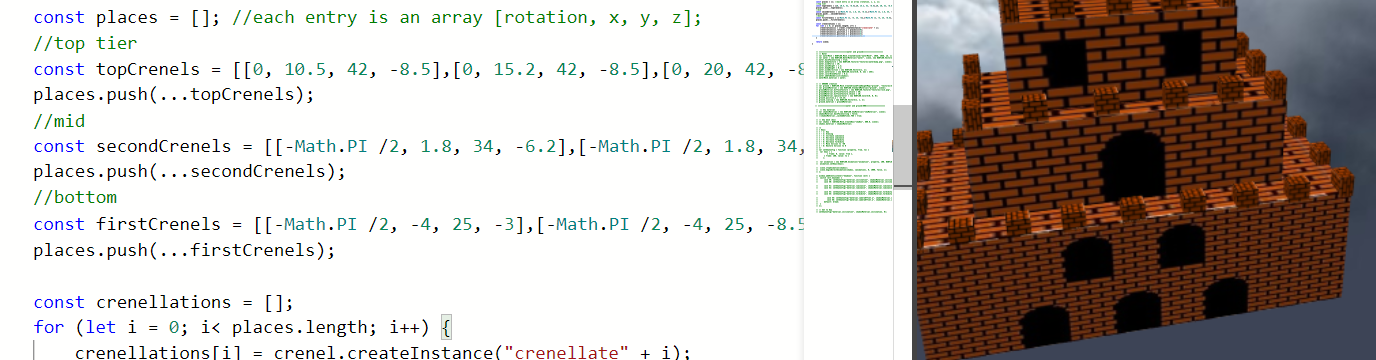
sigh of relief - we are working with JavaScript! and as this is JavaScript, we can do fun stuff like making a 2d array of important box-position-ish information entries and iterate over the whole thing, creating a copy of a single crenellation (that word is weird to me now) for each position set. Let's do that now. After some fiddling with positions (I am a stickler for collisions)...
Neat! But that's wet and ugly. Let's refactor so there's a single 2d array per castle floor, so the headache decreases (and we dry off a bit).
getting fancy...
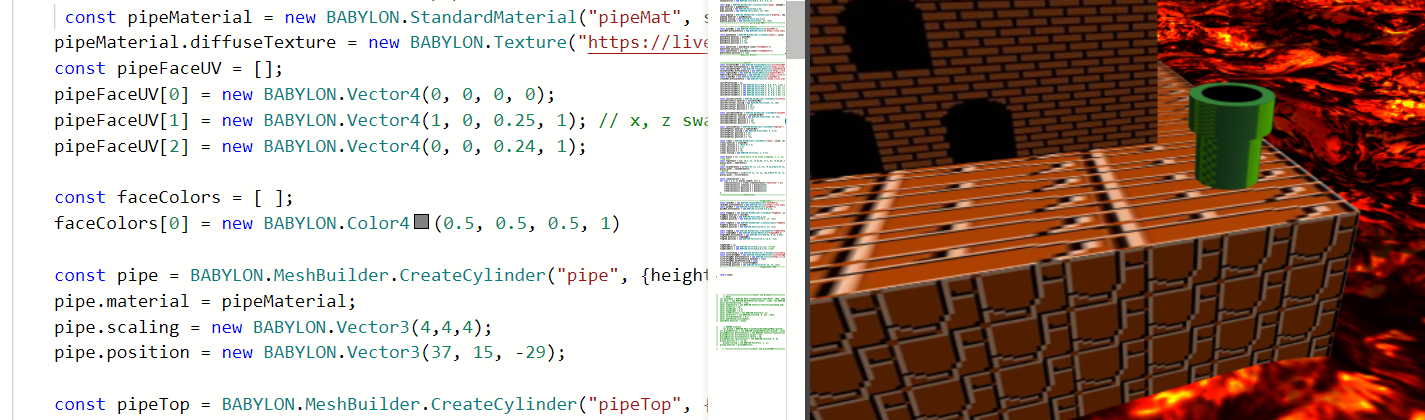
See, you can create all SORTS of shapes, not just boxes. What about cylinders, spheres, tauroids, arcs, and slices? Hoooyeah.
There's a playground for each basic shape, for camera manipulation, light setting, animation, tons of them! That means understanding how it works can happen in real time without too much debugging if you understand JS basics.
A wave of the ol' GIMP wand, and PRESTO! We have a classic world-pipe.
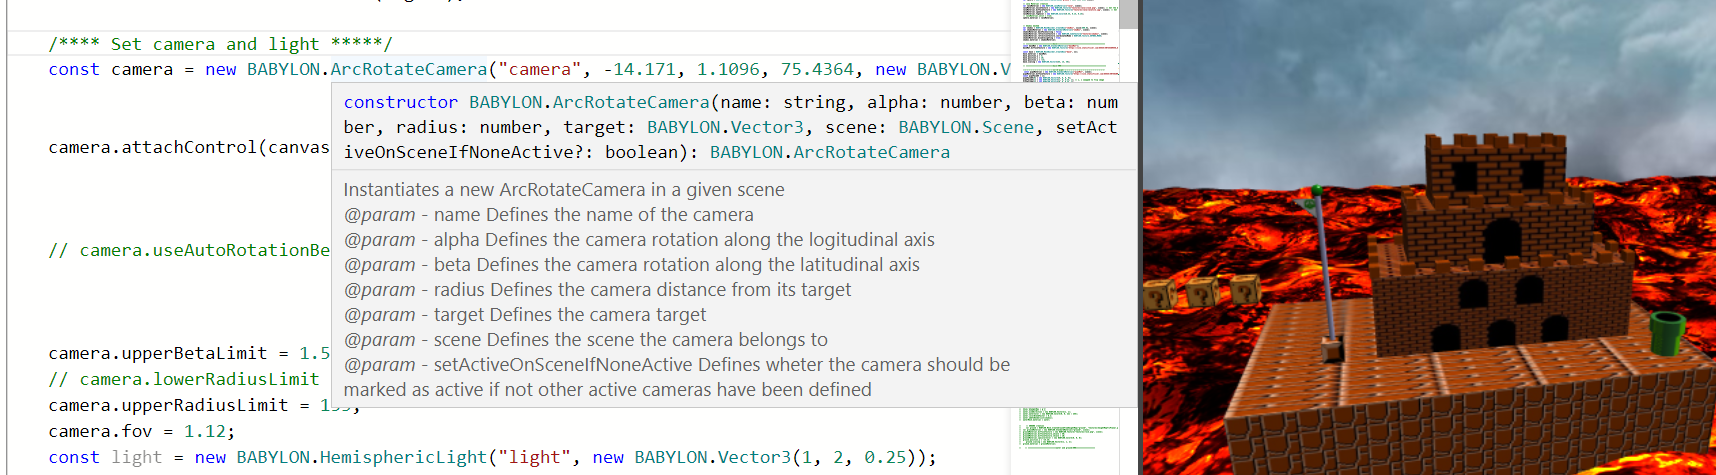
A few more finishing touches and we'll be ready to show off. Let's deal with making sure our poor camera doesn't sink below the lava-layer and confound the viewer by showing them a bunch of empty back-rendered nonsense. There are a few ways to go about this, actually, but let's focus on the camera for now.
You get all sorts of neat tooltip info by hovering over any of the constructors or methods in the Babylon playground, including of course various arguments you can pass directly on creation of your camera to adjust it. There are also cool features like auto-rotation behavior for a neat panning effect.
all together now!
Using the easy mode for dropping in a scene as mentioned above is great for most static pages, but as this blog has a seriously layered hosting solution I elected a more thorough way to build the script directly into this page project. Note that CORS can affect your successful load of the scene, but as long as you fix 'yer headers on the hosting origin, or better yet, just host your scenes wherever you plan on putting them up as additional assets, you'll be fine!
If the above demo didn't load on your browser, or if you just want to poke around, Here's a link to the playground as I finished it! If you click on the above embed, you can do all sorts of keyboard camera controls like ctrl + arrows, alt + arrows, etc, as I haven't wired the keypresses to any individual animations for this demo.
Enjoy fiddling with the camera features, light bouncing, animations, and all the other neat stuff you can do, you have now (hopefully) successfully made your first real scene!
If you liked this dive into the freshness, stay tuned! I'm setting my sights on an intro to three.js next.
Onward and upward,
Evan out.